
Typer layouts and sidebars
Typer layouts and sidebarsSet the default layout
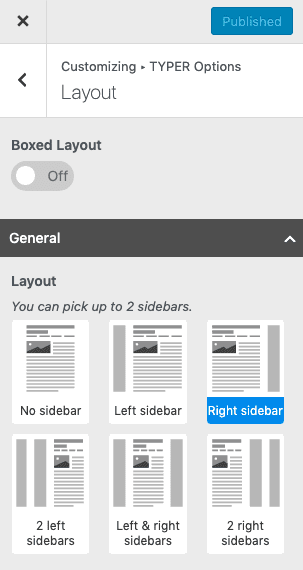
Section titled “Set the default layout”This will set the default site layout, but it can be overridden at page level when editing a page or a post. But just so you won’t have to override every time for each post, we split the option into 2 different options. So you can set the site layout for general and for posts.
-
From the WordPress admin, go to Appearance > Customize.
-
From the Customizer left menu, go to Typer > Layout.
-
Choose one, two or no sidebars.
The same settings are available for posts.
Set the layout of one page or post
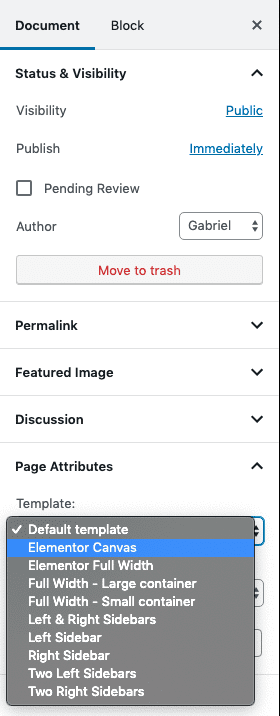
Section titled “Set the layout of one page or post”If you’d like to show or hide sidebars on specific pages only and not on all pages/posts, you can do this in the page editor in Post Options section.
Here is how to show a sidebar on the right side of the content on a specific page:
-
Go to WP Admin – Pages
-
Edit the page you want to change the layout for.
-
Go to Page Attributes section on the right.
-
Set Right Sidebar
Layouts for archives, search and other pages
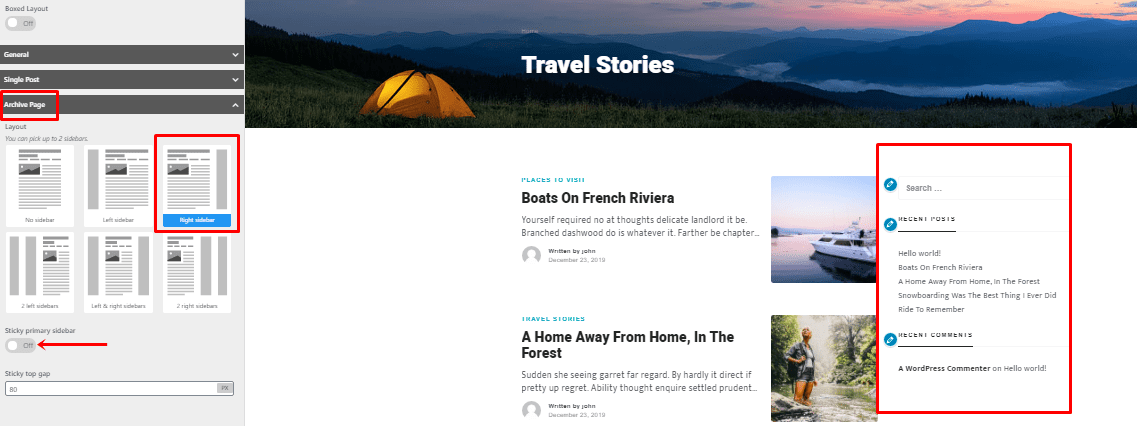
Section titled “Layouts for archives, search and other pages”In this tutorial we shall see the various types of layout found in the Typer theme and how you can apply it in different pages within your website. These types of layouts depend on two situations one is the content width and the presence of sidebars. Typer theme comes with six types of layouts depending on the set of sidebars. They include the no sidebar, left sidebar, right sidebar, 2 left sidebars, 2 right sidebars, and left & right sidebars. Typer theme allows users to change the layout structure in the general pages such as the front page, custom pages. It also allows change of layouts in single pages such as a single post page and finally it allows users to change layouts in archive pages such as categories and tags.
Change Layout in General pages
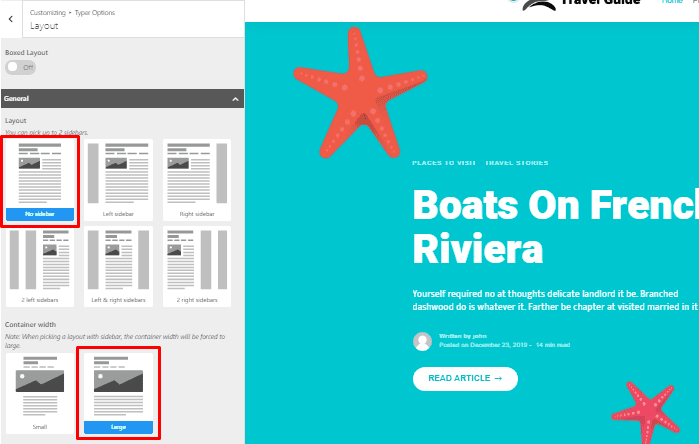
Section titled “Change Layout in General pages”Typer includes an option to alter the general layout for a page such as the about us or contact page. To achieve this, just go to WordPress Dashboard > Appearance > Customize > Layout and under general you can select the layout style you want to change. The no-sidebar layout is the most preferred and default layout of such pages. Users can set the container width from small to large. Layouts with single or two sidebars allow you to set sidebars to be sticky or not.
Change Layout in single post pages
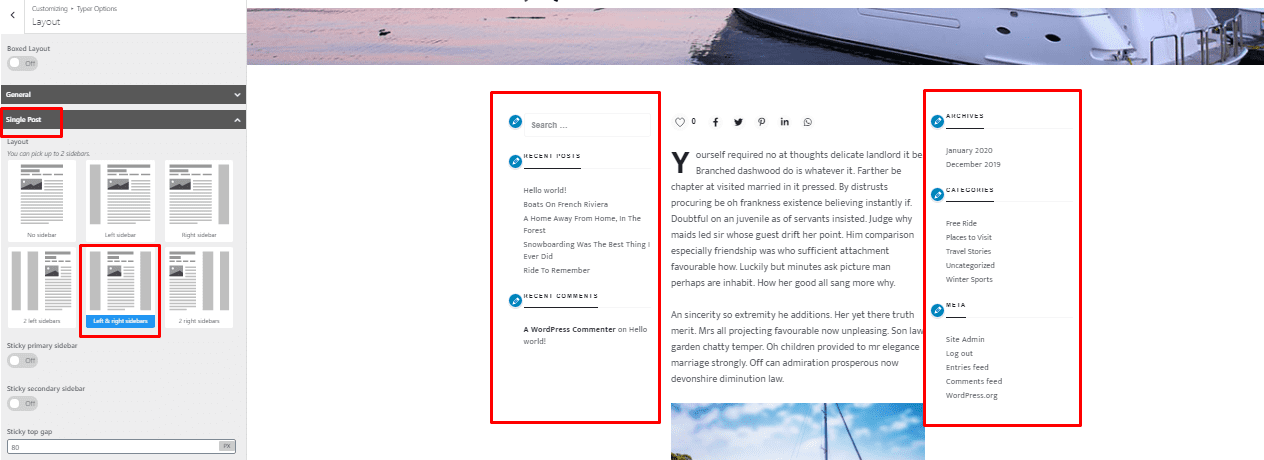
Section titled “Change Layout in single post pages”This allows users to change layouts on the single posts page of your blog. To change this go to Dashboard > Appearance > Customize > Layout and select single post. This works best with all sidebar layouts. One can also go ahead and enable the sticky sidebar option and customize the sticky sidebar gap.
Change layout in archive pages
Section titled “Change layout in archive pages”An archive page is age that contains post items based on a commonality. Archive pages are like categories or tag pages. Archive pages also allow changing of the layouts with the default set to no sidebar. Users can also change the layouts to incorporate sidebars. A left and right sidebar could work best depending on the **post listing style **you choose. One can also enable or disable sticky sidebars within the archive pages.
Sidebar locations
Section titled “Sidebar locations”Widgets allow you to customize different areas of the site. Typer has 6 widget areas, which you fill in Appearance > Widgets:
-
Main Sidebar - will show on the left or right of the page’s content
-
Secondary Sidebar - will show on the left or right of the page’s content
-
Footer column 1-4 – will show in the footer of the site
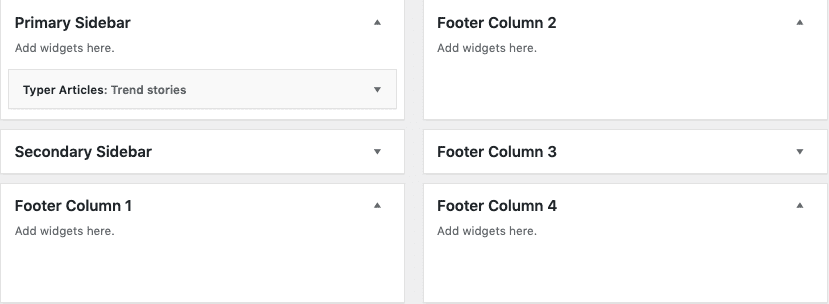
Note: You can have both Main & Secondary sidebars enabled at the same time.
Sticky sidebars
Section titled “Sticky sidebars”You have the option to set sticky your main and secondary sidebars for your general layout and for the single post layout also. More than that, Typer Pro gives you the option to set the sidebar sticky only on a particular post if you wish.