


In this guide, we will sum up suggestive ways to help you optimize the speed of your website. This tutorial provides a step by step illustration on the best strategies and tools you can use to speed up your WordPress site.
WordPress now drives more than 38% of the web. Although this may be something great, that in itself means that it is necessary to concur with dozens of new themes, plugins, and advancements. It can sometimes be a miserable experience for regular daily WordPress users if their site’s frame-speed begin to drop and they do not understand for certain why and where to begin troubleshooting.
Statistics from Google indicate that 50% of website visitors expect a mobile website to load within 2 seconds. 53% of users will probably leave the blog page if it takes longer than 3 seconds to load. The performance metrics of the desktop website are no longer a concern. There is a vast majority of traffic coming from mobile devices which is currently available on most websites compared to desktop.
Using this blueprint, developers and users can speed up their WordPress websites and significantly reduce the periods for mobile and desktop browsing whereas, making them far much easier to use. Even if you do not own a WordPress site, it doesn’t mean that this guide is not of importance. Most of the speed optimization approaches discussed below can be used not only in our themes but also on any form of CMS website.
Table of Contents
Basics
Methods to Improve Page Speed in WordPress
- What is Lazy Loading?
- Which are some Sample Sites Implementing Lazy Loading?
- What are the Positive Impacts of Lazy Loading Images?
- How do I implement Lazy Loading in My WordPress site?
Resource Compression (Gzip or Deflate)
Remove query strings from resources
- What is to minify & concatenate
- How to Minify CSS and JavaScript Manually
- How to Minify WordPress Files With a Plugin
Testing & Optimization
How do I test my WordPress site speed?
Testing Results Before And After
What is page speed?
Website Speed is basically the span of time a web page requires to completely load. A definite explanation would be the period of time the web hosting servers would take to download the WP Web page or media content.
You might also come across other definitive terms basing their explanation on how long it takes to get the first byte of information from their web server by a web browser like Chrome. Sometimes developers use this to measure the period it takes to begin the loading process which is different from the above description.
There could be a significant difference between page speed and site speed as referenced from google analytics. Site speed on the other hand basically measures the actual page speed but only for a sample of page views from your WordPress site.


Why Page Speed Matters
Whilst the online web world evolves, users are increasingly tending to be impatient. It seems we have become busier than ever and Google is clear about the negative effects of low page speeds on bounce rates because as highlighted earlier, most people using mobile phones for browsing reasons tend to give up really quick if the loading speed is slow.
Some negative effects that may result in less optimal page speeds are the following:
- Brand reputation and legitimacy:
For instance, if your company’s site loads for 4 secs compared to another company’s site which loads at 2 secs, this would potentially hurt your brand and may even attribute to cost you around 30% of your website visitors. It is especially troubling if the visitors come across the brand or the business for the very first time. Chances are they will bounce off your website because it loads too slowly and you probably might not see them back. - User experience :
It is essential that opportunities and customers can easily do business with your company in a friendly customer experienced culture. However, in case the loading and navigation process through your website is slow, users assume that it represents how it’s like to work with your business which is an inconvenient experience. - Lead generation / conversion :
Sluggish sites have a significant effect on revenue, and the other way round is true. When your website loads at levels below optimal speeds in both desktop and mobile interfaces, users will keep leaving the brand’s website even before the first conversion action takes place. - SEO and keyword rankings:
Search engine optimization (SEO) plays a crucial role in maximizing the page speed. Google is the figurehead in ensuring that websites are optimized at good speeds.
Starting from 2010, Google stated that page speed will be part of its search index rankings. In 2017 Google revealed it would further address the page speeds, from mobile sites or rather pages that purposefully rank in mobile interfaces.
Now Google is getting to grips with the AMP project –an initiative to make mobile devices load pages faster.
What determines your site’s speed?
Let us briefly see why our WordPress website would be sluggish before we get into details of how to fix them. After knowing what triggers long-time loading speeds or long wait times, the measures you can take to resolve them will be simplified down.
- Selection of a web hosting Provider: Slow or substandard hosting that can not suit your standard of traffic or site will affect the speed.
- Image compression or optimization: Huge sizes of images and videos that are uploaded.
- High use of 301 Redirects.
- Use of Plugins and Widgets: Having too many plugins or outdated plugins.
Methods to Improve Page Speed in WordPress
Image Optimization
From stats based on the latest HTTP Archives in August 2019 images represented an average of 35% of weight for the entire website. While videos are much more difficult to optimize, images are by far the first way to get started! Apparently, optimizing them is more decisive than CSS and Javascript as well as Fonts.
It is not recommended for you to upload huge, unoptimized images and then utilize them in a small space on your webpage. Serving scaled images is quite essential in the optimization of images.
Some of the steps to optimize your images include:
- Select Appropriate Image Formats:
JPEG and PNG are by far the most commonly used online image formats. By picking the right image format you could save much on image file size.
For sections such as logos, it is recommendable to use PNG images as PNG provides transparency support and high-quality images.
As for JPEG images, these are more appropriate for other sections within the site such as sliders and featured images as they allow a full-color palette and maintain a balance of quality, sharpness and file size especially when optimizing the images. - Image sizing and Shrinking:
It is quite important to ensure that images used on various sections within a site match the size intended to be rendered. For instance: If you have an image space on your webpage that has a limit of 600 x 300 px and you upload an image of 1920x 1080 px or even larger!. and you continuously do this on other web pages, your entire site will have a very slow loading speed.
To rectify this, ensure that the size of the image space you are using is a good fit and then resize the image appropriately. Image dimensioning programs such as photoshop, gimp or photoscape can handle this task. - Compress your images:
How about the already uploaded tons of images? This is where compression plugins for image scalability are helpful. The plugins scan and refine the image store and handle all uploads of images in the long run.
Here are some plugins we recommend:
WP Smush: (optimizes images externally, Incorrect Size Image Detection, Lossless Compression, Bulk Optimization up to 50 images )
Imagify: (optimizes images externally,lossy & lossless compression, convert WebP images )
ShortPixel: (optimizes images externally, Offers three different conversion levels, Is capable of converting to WebP format.)
Optimole: (optimizes images externally, Supports both Retina and WebP images, Full support for page builders like Elementor)
EWWW Image Optimizer: (optimizes images externally, Uses SSL encryption for extra safety, Is capable of converting to WebP format.)
Lazy Load Images
Images make up quite a huge percentage of web content. These images can lead to high load time of a website especially if the image file sizes are quite large. This tends to be quite frustrating and leads to a bad user experience.
Lazy loading of images comes in as a handy solution to these scenarios.
Here we will cover a number of questions on Lazy Loading:
- What is Lazy Loading?
- Which are some Sample Sites Implementing Lazy Loading?
- What are the Positive Impacts of Lazy Loading Images?
- How do I implement Lazy Loading in My WordPress site?
What Is Lazy Loading?
Lazy Loading is a web optimization technique whereby content is only rendered when a user initially scrolls to a specific viewport within his device or rather a specific content area. This content does not necessarily have to be restricted to images. It can also apply to videos and comments. In our case here, we will mainly focus on images.
With lazy loading, content within a page is not loaded all at a go, but rather in parts and only when there is a scroll action to the specific sections.
Which are some Sample Sites Implementing Lazy Loading?
Typer Theme – Travel Agency Demo


What are the Positive Impacts of Lazy Loading Images?
One of the greatest advantages of Lazy loading is having a faster web load time. This tends to be of great help to most users and especially users who use mobile devices, of whom constitute the highest percentage.
A faster load time would also mean saving up on bandwidth. This would eventually lead to better user experience.
How do I implement Lazy Loading in My WordPress site?
Attribute Approach
Most web browsers use the “src” attribute to deploy the loading of images. If instead the image URL is stated with the “data-src” attribute from the image tag or iframe tag, the browser will not start loading the image immediately as the “src” is undefined.
<img data-src="https://seventhquen.com/demo/default-image.jpg" />
The loading attribute could also be used to withhold loading off-screen images and iframes which can be accessed by scrolling. In order to avoid the surrounding content from being mirrored above or below when the lazy image is downloaded, ensure that height and width attributes are added to the < img > tag and that their values are specified in an inline style as shown below:
<img src="https://seventhquen.com/demo/default-image.jpg" loading="lazy" alt="…" width="200" height="200">
<img src="https://seventhquen.com/demo/default-image.jpg" loading="lazy" alt="…" style="height:200px; width:200px;">
Use of WordPress Plugins
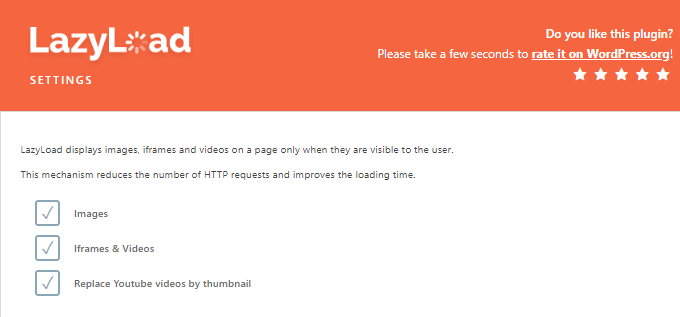
- WP Rocket Lazy Load
Lazy Load by Wp Rocket is a free plug-in that only shows visible images on the on-screen web page. It minimizes the loading duration of the HTTP requests mechanism. The plugin also functions on images of an articles, images in widget areas, avatars, iframes and smileys.

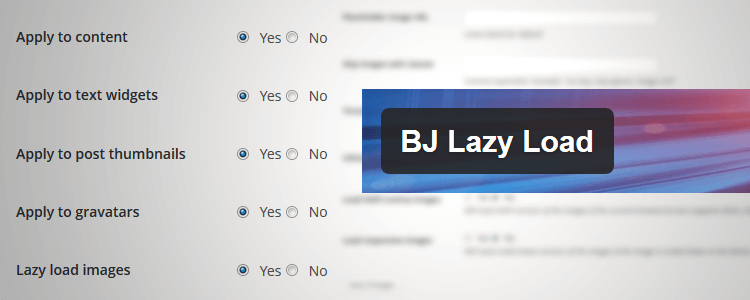
- BJ Lazy Load
BJ Lazy Load allows you to lazily load and substitute placeholder content for selected pictures, including post and thumbnails, gravatar images and iFrames. The content will be loaded when the visitor scrolls the page, when it is close to the browser window. Performs well also with text widgets too. Non-javascript visitors get the original element in NoScript. Compatible with the RICG Responsive Images and HIDPI images.

- A3 Lazy Load
A very easy to use lazy load plugin that can accelerate the loading page speed of your site. This is a mobile plugin that enhances your site’s speed performance. This lazy plugin loads the images from your posts, pages, widgets, thumbnails, and Gravatars as well as other parts in the website. It lazy loads images, videos, iframe, built-in post, WordPress AMPs, Jetpack Accelerator, WEBP IMAGES, and Custom Advanced fields.


Site Caching
Cache refers to the data which is temporarily saved and stored. So next time the visitor browses the site, any file through your site does not need to be updated and is stored in caches which speeds up things a whole lot faster. Contrary, in case the site has not been cached, each time the site has loaded the browser will load the full content, with all text and media data.
It should also be noted that such caches can be found in even more than a single location which includes:
Visitor-side cache
Also referred to as ‘browser caching’, which is described to be a process that is currently performed automatically by most web browsers. The browser stores static info on the user’s device memory -local hard disc. The static info includes CSS, JavaScript, images, and uses them again every time the user accesses the website within the same device.
Server-side cache
This form of cache happens on the server, thus you have to worry about it mainly while optimizing the WordPress page. This specifically applies when you run a high or low traffic site on shared hosting. In fact, it can also be much more complicated.
WordPress Caching Plugins
When you try to enforce caching to your WordPress site, then it is time to select an appropriate plugin. It is worth noting that many WordPress hosting services have a default caching tool and it could have been configured for their users already.
Either way here are some tabulated WordPress plugins that we recommend this year;
| Wp Super Cache | Wp Rocket | Wp Fastest Cache | LiteSpeed Cache |
| Simple and custom caching | Page Caching & Cache Preloading | Mobile Cache & Widget Cache | Object Cache (Memcached/LSMCD/Redis) |
| Page compression & Cache rebuild | GZIP Compression + Browser Caching | Optimize Images & Convert WebP | Image Optimization & WebP support |
| CDN support | Database & Google Fonts Optimization | Database Cleanup & Google Fonts Async | Multiple CDN support |
| Garbage collection | Lazyload | LazyLoad | Lazyload images/iframes |
| Preloading and API resetting | Minification & Concatenation | Minification of JS, CSS & HTML | Minification of JS, CSS & HTML |
| Free Plugin | $49 per annum | Free Plugin | Free Plugin |
Resource Compression (Gzip or Deflate)
Gzip is a files compression method for faster network transfers (which can make files smaller). It is a file format as well.
Compression enables the webserver to supply your website readers with narrower file sizes that are often loaded faster. Normally compression is triggered by inserting code to your dedicated host provider/server’s file called the .htaccess.
The .htaccess file manages the flow of your website. In case you do not recognize the .htaccess file and probably do not know where to find it please check out the image illustration below :


Once you have a trace of the file, click to edit and add either of the codes below:
<ifModule mod_gzip.c>
mod_gzip_on Yes
mod_gzip_dechunk Yes
mod_gzip_item_include file .(html?|txt|css|js|php|pl)$
mod_gzip_item_include handler ^cgi-script$
mod_gzip_item_include mime ^text/.*
mod_gzip_item_include mime ^application/x-javascript.*
mod_gzip_item_exclude mime ^image/.*
mod_gzip_item_exclude rspheader ^Content-Encoding:.*gzip.*
</ifModule>
or:
AddOutputFilterByType DEFLATE text/plain
AddOutputFilterByType DEFLATE text/html
AddOutputFilterByType DEFLATE text/xml
AddOutputFilterByType DEFLATE text/css
AddOutputFilterByType DEFLATE application/xml
AddOutputFilterByType DEFLATE application/xhtml+xml
AddOutputFilterByType DEFLATE application/rss+xml
AddOutputFilterByType DEFLATE application/javascript
AddOutputFilterByType DEFLATE application/x-javascript
Simply refresh your website after saving the.htaccess file and find out if your compression goes well with the Gzip compression tool. Gzip generally saves about 50 to 70% of the file size when it comes to compression of your HTML and CSS.
Remove query strings from resources
Query strings are the portion of a URL of a website, which contains unique characters like “?” and “&” and are called by URLs of the style sheets or scripts, which normally have attached query strings for just the considerations of the cache.
Just by the end of some website addresses, JavaScript or CSS files, you may notice that their file version is shown. For instance in a domain like this: domain.com/style.css?ver=4.4. Such query strings can be effective while handling other versions of a file. Developers of WordPress can use versioning of these files to prevent caching or performance problems.
You can store static resources by eliminating query strings from static resources such as CSS & JavaScript. More so if you enable caching on proxy servers it’s also recommended to eliminate the query strings. Consequently, you could end up improving the Page Speed of your site significantly.
How to Remove Query Strings from Static Resources
In order to eliminate query strings and to optimize the Page Speed for that matter, there are a number of plugins that would be an appropriate fit for this case:
W3 Total Cache: This plugin is a common WordPress cache plug-in that significantly increases the loading speed of your website.
For you to be in a position to remove the query Strings using the plugin, please follow the steps below :
- You must first install it on the WordPress website and activate it.
- Next, navigate to Performance >> Browser Cache in plugin settings.
- Now, move down the browser cache part and uncheck the “Prevent caching of objects after settings change” section.
- After that, check the “Remove query strings from static resources” option.
- Lastly move down to save the changes made.

WP Remove Query Strings From Static Resources
For this plugin, you would just need to install it on your site. Nothing else is required. It will automatically handle the removal of the query Strings.
Assets minification & concatenation
What is to minify & concatenate
Minification is a file formatting mechanism with the aim of removing all characters that have no significance. This includes spaces, line breaks, tabs, and many others. It basically shrinks the sizes of your files such as HTML, CSS & JS files, without affecting their functionality.
For instance, a certain CSS code would take the format below:
#header1 {
font-size: 2em;
color: blue;
}

#header2 {
font-size: 1em;
color: red;
}
If this piece of code was to be minified, it would result in looking as follows:
#header1{font-size:2em;color:blue;}#header2{font-size:1em;color:red;}
Essentially the main purpose of minification is to minimize loading periods and ultimately speed up the website. In addition, casual code readers are concealed from reading or analyzing the code. Another reason why it is important to minify your code is to save on bandwidth usage.
With concatenation, you can combine CSS or JavaScript files into one, along with file minification. This approach copies all CSS (or JS) scripts and then inserts them again to create a large, distinctive file.
The aim is to only produce one file per file type (CSS or JavaScript), but it’s often easier to come up with a few large files, rather than one large one, for functionality purposes.
How to Minify/Concatenate Codes Manually
The manual minifying process allows CSS and Js code to be compressed easily using a designated platform to enhance a compact formality. The best recommendation is by using different platforms. JS and CSS would use Minify as a good starting point. On the side of JavaScript other alternative methods are JSCompress and JavaScript minifier. Minifycode would be a great selection for HTML files. To concatenate various scripts most developers use semanticmerge, or filesmerge.
All these platforms might end up yielding the same results, but it is recommended that you save both minified and non-minified codes in any case the platforms tamper with the codes.
How to Minify WordPress Codes With a Plugin
The use of a WordPress plugin is an alternative means of minifying/shrinking your sites’ HTML, CSS, and JavaScript files. Since these scripts are vulnerable, you can ensure you always use a reliable and stable plugin. Here are the common minifying plugins we propose:
Autoptimize is one of the best and most common minification plugins. It wraps up, optimizes and caches the WordPress assets so that very few site requests can be made. Although this plugin provides several other solutions such as caching, it is suitable for those users who would like to have a ‘one-click ‘ minification solution.
The Autoptimize plugin is simple to understand for newbies and offers a wide range of solutions for better performance. More so it is free, even if the developers still offer premium presets, such as personally custom-made installation and optimizations on your site. For these tasks, it will cost the client € 119 and € 599 respectively.
It’s easy to say that this plugin is perhaps the best one to execute multiple tasks from this guide in a very simple way. Moreover, it does have a great ability to speed up your website by minifying CSS or JS scripts.
As shown in the image below, this minifying option is one of the key optimization methods used by the plugin. You’ll also find out that it has an option for concatenation which is a secondary optimization method that generates a single file from all the CSS and JS files.
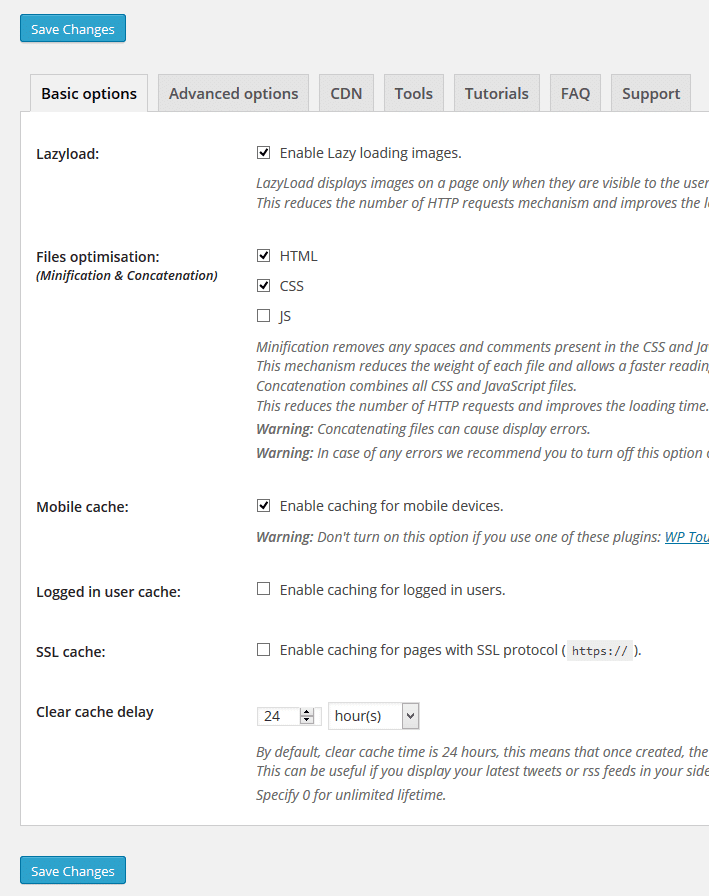

As indicated earlier this plugin is not free and has a subscription tag of around $49 per annum and considering it saves you lots of time, we would highly recommend it.
Content Delivery Network CDN
This is a network of servers all over the world (also known as POPs). They are configured to hold and provide copies of static/dynamic content on your WordPress platform, including images, Javascript, CSS and video streams.
A CDN is not a substitute replica to your host server but an extra way to boost your website speed.
Read our in depth article and learn more about Cloudflare advantages and how to activate it for your site.
https://seventhqueen.com/blog/guides/how-cloudflare-cdn-can-speed-up-your-site-and-how-to-activate-it.html
Testing and Optimization
How do I test my WordPress site speed?
Recommendation:- GTmetrix
GTmetrix is a platform that provides a good match between user or starters friendliness and with a detailed data scope. You may start by putting into your website’s URL in their main website and select Analyze to view your site’s info. Most of the contents of the WordPress site include small unique elements, including scripts, logs, and schemes, which create a completely functioning WP site when all are combined. Nonetheless, these elements are not 100% optimized, and this is where GTmetrix performs its role and gives you comprehensive results to improve your WordPress site loading speed.


GTmetrix gives you an overall score using a simple grading system based on the overall elements it checks. It shows a detailed summary, going through different features of your website which include:
- Image optimization and compression
- Leverage browser caching
- Minifying of JavaScript and CSS
- Optimize the order of styles and scripts
- HTTP requests optimization
- Minimizing redirects, and much much more.
Recommendation: Pingdom
Pingdom is another user-friendly option for frequently measuring the load times. Most beginners may probably use this as it’s the most common speed testing platform for WordPress sites. Load times on Pingdom will typically be a little faster, since the load time of pages is tested slightly differently from GTMetrix, whereby the prior uses on-load time, while the latter uses fully loaded time.
From the Pingdom site, simply choose the location of the server from where your website load time is to be measured. To obtain better results it’s recommended to choose a server closer to you.
The summary results give you the most important information. Briefly, information for your website include:
- Performance grade
- Load Time
- Page Content size
- Total File Requests


Load tests mimic the performance of the back-end, of a number of unique users visiting your website. If you’re really concerned about the accessibility and scalability of your website, you should test your website on this. Within the benchmarking test of this platform, it will emphasize on monitoring the performance of your requests, the server wait time and the number of errors returned which are the two most important factors of this assessment.
Test Results Before and After Optimizations Using GMetrix
Typer theme results before and after optimization of the website. The used plugins for this case were Autoptimize , W3 total cache and EWWW image optimizer of which helped in the minification, caching and image optimization respectively.
Final Thoughts
Having a good page speed score for your site would require you to implement the above-mentioned methods.
There are also a number of other methods that can still be implemented to help in improving the page speed of a website, therefore the list does not still stop at this.
If each of the methods mentioned above are applied, then you will be amazed by the noticeable changes in the speed of your WordPress website.


People reacted to this story.
[…] and image optimization. These strategies have been discovered further in our previous post on “The Ultimate WordPress Speed Guide“. This should help you prepare your website for faster loading time before performing your Local […]
[…] website with low page load speed scores can always be improved. Here is guide on how you can speed up your […]